Showing posts with label canon 350D. Show all posts

Wednesday, June 2, 2010

What I've learned in 1 year

So, it's been a year since I started this blog, and I thought this would be a good time to reflect on what I've learned about my camera(s!) and about photography since then.

I'm hoping to write this post in a way that will help other beginning DSLR users who are as confused as I was about the manual settings of their cameras.

I remember that my biggest question when I was learning how to properly use the manual settings on my Canon 350D was what settings to change when. (Isn't that the only question? :))

I dumped myself right into the learning curve and started using M mode all the time -- never Av, and never Pv (I now use mostly Av).

So, what's the No. 1 thing I've learned?

It's all about light.

In that light (ha! punny!), I learned about my camera's settings as they relate to light:

1. I learned that a higher ISO (higher sensitivity) would "let in" more light (the change to the image would be an increase in noise).

(Photos below taken from this awesome write-up on POTN.)


2. I learned that a lower f-stop number (larger opening) would let in more light (the change to the image would be a narrower DOF, which means that less of the image would be in focus).

....and here, the photo on the left was taken with a high f-stop number (a smaller opening), and the photo on the right was taken with a low f-stop number (a larger opening). Less is in focus with a smaller f-stop number / larger opening:


3. I knew that a longer shutter speed lets in more light (and the change to the image would be, maybe, some motion blur [this would depend on how much it was lowered]).


(Photos above taken from this awesome write-up on POTN.)

But as a beginner, if I needed more light to capture a photo, I didn't know which of these settings I should change to get it.

My step 1
I learned two things:

1. ISO 100 is the base ISO (for most digital cameras), and I should use it whenever possible because it will give me the best image quality. Higher ISOs introduce digital noise into a photo (see photos of pink flower, above).

2. Unless I'm shooting a "still life" (literally), I'm using a tripod, or unless I want a special effect, a higher shutter speed is always preferable, because it will stop any motion in my subject, my background, or any motion due to my own hands shaking the camera accidentally. (Also, I now know that there is a formula of some kind for this -- shutter speed should never be less than something-times-the-focal-length-whatever -- but I've yet to memorize that formula or really put it to use. I just use as fast a shutter speed as I can.)

So -- for a simple, "normal" shot of a person or two, something interesting while traveling, &c., I should try to use ISO 100 and a high shutter speed.

My step 2
I was shooting in M mode, so my method would go like this:

1. Set ISO to 100 if sunny or bright. Set ISO to 200 or 400 if shady or indoors. (And 800 or 1600 if nighttime, very low light, &c.)
2. Set the f-stop to whatever I thought made sense for the shot. (I actually ignored f-stop for a while because I didn't know what it did, but I include it here for simplicity's sake.)
3. Move my top scroll bar (which controls shutter speed when in M mode) to the left or right to get the flashing line dead center on my exposure meter.
4. Take the shot!

Sometimes, I took the photo, but it was still too dark.

Sometimes, I scrolled for shutter speed until I couldn't scroll anymore, and the flashing line still wasn't in the center. This meant that my camera was unable to get the shutter speed necessary to get adequate light for that shot, considering the ISO and f-stop settings that I had chosen, OR, there was too much light reaching the sensor, and my camera couldn't use a fast enough shutter speed to get accurate exposure (my XT only went to 1/4000 sec.).

That's when I knew I needed to change a setting to let more light in to my sensor.

Step 3
To let in more light, my options are:

1. Lower the shutter speed (which would let in more light, and the change to the image would be, maybe, some motion blur [this would depend on how much it was lowered]).

This is a good option if the SS is already pretty high (1/4000, 1/2000, &c.). Again, some people cite the not-longer-than-X-times-focal-length rule here, but I can't ever remember that rule.

This is NOT a good option if your SS is already pretty low (unless you're going for a certain special effect, or unless you're shooting with a tripod, which I almost never do).

If you let your SS get too low, your image will look like this:


Yeah, I had enough light with this shutter speed, but this kind of photo is not exactly what I was going for :) This photo was taken with my 50mm at f/2.0, ISO 400, and a shutter speed of 1/13. Were I to retake this photo (excluding flash as an option), I would probably be wise to bump up my ISO as a first choice, at least to 800, and maybe to 1600. See Option #2 about ISO below for more details about this shot.

2. Raise the ISO (which would let in more light, and the change to the image would be an increase in noise)

This would introduce noise into my photo, but with my 350D, probably not noticeably until ISO 400, or in some cases, ISO 800.

This is a good option if I'm taking a hand-held photo of someone doing something and don't want to lessen the depth-of-field by lowering the f-stop number, like the image above.

In the example image in #1, I said that to improve the image and get less blur, I would likely bump my ISO to 800 or 1600 to let in more light but allow my aperture to remain the same. I say that because my aperture was already at 2.0 (this lens goes to 1.4), and if I opened it wider, my focus might look off since this is a shot of someone doing something, not just a portrait or a more artistic shot. If I just quickened the shutter speed without changing anything else, the photo would be less blurry, but it would also be far too underexposed, because nothing else (no other setting) would be compensating for the lesser amount of light reaching the sensor.

So, by bumping my ISO to 800, a faster shutter speed would allow me to get this image:


So, this image isn't perfect, but it's much better compared to the first, blurry one.

3. Lower my f-stop number (which would let in more light, and the change to the image would be a narrower DOF, which means that less of what I focus on would be in focus)

This is a good option if I'm taking a photo like the one below, and I had started at f/4 or something. By lowering it to f/2, I would lose almost nothing, but I would gain several steps of light. If focused correctly, the subject should still be in focus with that DOF.

This is a good option if I'm taking a more artistic kind of shot, and a narrower DOF would increase the interest of the image, like this image, which was taken with my 50mm at f/2:


This is NOT a good option if your f-stop number is already pretty low, and any lower would render important parts of your photo out of focus (because of the smaller DOF). This is also NOT a good option if you're taking a landscape shot, a shot of a group of people, or any other shot where you want almost everything to be in focus.

In sum
So I learned that the setting I should change depended on what I was taking a photo of, and how I wanted that photo to look. That may sound obvious, but I truly did not realize this when I was learning about my camera's settings. I wanted there to be a formula for the settings at all times -- change Q when X is Y and Z is A. But it doesn't work like that. I am slowly learning to let my naturally logical mind be more creative (an ongoing process, obviously).

I hope my explanation makes some sense, and maybe it will help someone else who is learning!

Other random things I've learned
A few other things I've learned about photography over the past year:

1. White balance. I learned not to forget about my white balance setting. Remember my third post on this blog? Here's another photo from that day:

I had my white balance set to "Fluorescent." FAIL! But what an excellent example of one of my photographic learning experiences.

I've actually grown accustomed to leaving it on "Auto White Balance" just in case I do forget about it (which I usually do), but AWB on my XT pretty much sucked. To put it bluntly. It was always wrong! Unless I was outside on a sunny day, I almost always had to change the WB in post-processing, which I can do easily since I now shoot almost exclusively in RAW. Speaking of...

2. Shooting in RAW. RAW files are much more easily manipulated in post-processing than JPEGs. You can eff up the exposure on a shot, but if you shot it in RAW, there's a good chance you can recover it, at least somewhat, in post-processing. Not that you should rely on post-processing to fix your shots instead of learning how to take them in the first place, but it's a nice plan B when you take a quick shot and then realize you forgot to change an important setting, for example.

3. How to clean my camera and lenses. I was afraid, for a while, to mess with the "guts" of my camera, or to do anything except change lenses. (I do keep my lens caps on religiously, though!) Two relatively large dust specs on my sensor encouraged me to learn how to properly clean inside my camera and how to really keep my glass clean. For my lenses, I have a lens pen and a microfiber cloth. For my 350D's and 5D's sensors, I have a small blower (used successfully two times!).

4. Post-processing skills. I downloaded the trial version of Lightroom several months ago, and, coupled with the fact that I shoot RAW now, my final images have increased in quality a lot. It's a blessing and a curse, though, because when the LR beta runs out, I'll be forced (yes, forced!) to actually purchase the software. I read briefly about the different processing softwares available and chose Lightroom almost haphazardly, but I've been very pleased. Most of the controls are pretty intuitive. I'm still discovering new tools that I didn't know the program had (and usually don't know how to use), so I am fairly certain that my skills won't outpace its abilities any time soon.

5. Still working on: Flash photography! The flash is fun to experiment with, and expect some shots using flash on the new blog. (Link to come.)

Fin.
Looking back on my first few posts to this blog, I can't help but be embarrassed about some of the mistakes I made. But then I remind myself that this is a learning process, and making mistakes is a huge part of learning -- and sometimes it's the only way to learn! I consider myself much better off having made those mistakes, and look forward (eep! do I?) to making more mistakes in the future. :)

Look for another post with a list of things I still need to learn...

Saturday, February 20, 2010

5D Mark II, 85 f/1.2L

So, I went to a camera store today to handle the 5D Mark II.

I'm in love.

Even just shooting around the store, I could tell a difference in the feel of the images. Also, the viewfinder is heavenly compared to my XT's, not to mention the LCD screen (how nice to be able to actually see the image you just took).

The guy asked me what lenses I usually shot with, and I told him primes. So what does he bring me? The 85 f/1.2L.

Well! First I took a few shots with my own 85 1.8. Here's one at f/1.8 (no editing except for a crop):


THEN --- the fateful moment --- I put on the 85L. Here's a shot at f/1.2, again, no editing, not even a crop this time:


As Stacy London would say, Shut the front door. That bokeh! So creamy! Such "pop" to the image!

The 5Dii has the top display for ISO, aperture, &c, so it took a moment to get used to how that worked. But my XT actually has a kind of similar display right above the LCD (which is one reason the LCD is so small), so it was really just a change in position and complexity.

The cam is obviously heavier, but with my 85 1.8 attached (my heaviest lens so far), it was not unmanageable. I wish I could have tried it out somewhere other than a fluorescent-lit camera store :)

I also tried a couple of shots with the store's copy of the 24-70L, and I paid attention to the feel of the focal length at 24mm, which is what I think my next lens purchase will be (eventually). It didn't seem too wide on the FF (my main concern), but again, I was shooting in a camera store! I am tempted to rent a FF and the 24L before I make either of those purchases, but I just can't help thinking that that could be money put toward the final purchase that would be a waste on a rental.

I also tried the video briefly, but I'm not sure I uploaded that file correctly to my Mac. Will deal with that later. Not particularly enthralled with video at the mo.

I am still wrestling with the decision about the 5D Mk II. I can afford it (in a few months), but is that how I should spend $2400? Canon is supposed to be making some more announcements on Tuesday, so if they by chance announce a 60D or equivalent that has good high ISO capabilities, reality may win out over emotions. A $1200 body upgrade is much more reasonable for a hobbyist like myself. I just wish they'd make a FF cam with no bells and whistles for under $2000. I get that it's the sensor that makes it expensive in the first place, but I am willing to sacrifice frames per second, fancy LCD screens, &c for an affordable FF body. I'm sure I'm dreaming.

The bottom line is that I want to upgrade to a body that will perform well in low light, and that I can take to ISOs above 1600 without seeing much noise. Am hoping to have a body upgrade by this fall. Until then, I plan to have fun learning lots about my two primes and getting better at post-processing.

Friday, February 5, 2010

85 1.8 arrived, testing

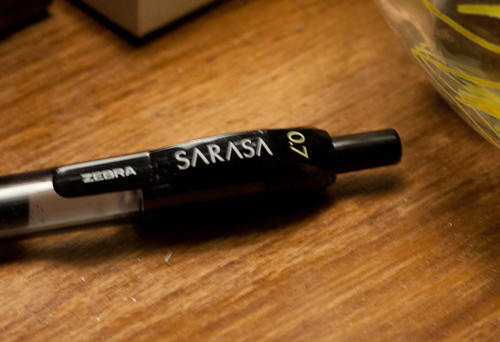
Right before our "historic" snowfall started -- the second one of the season already -- my 85 1.8 arrived. I've never really tested a lens before, and I don't usually read many in-depth tests of lenses myself, but I wanted to try this one out. So, I tested it for sharpness and focus last night at a few apertures between 1.8 and 5.0. All of the shots were at ISO 400. I tried to focus directly on the second (middle) "A" on "SARASA." All shots were hand-held, and these are small crops of larger scenes.

f/1.8, 1/125 sec:


f/2.0, 1/125 sec:


f/2.5, 1/80 sec:


f/3.5, 1/40 sec:


f/4.0, 1/30 sec:


As you can see, the image starts to get pretty fuzzy around f/4.0, but we're also looking at a significantly decreased shutter speed. I would like to do this same test outside, in sunshine, at ISO 100. Wonder what those results would look like. Thanks to The Great Blizzard of 2010 (not trademarked :)), it will be several days before I'm able to try a test like that.

At any rate, I'm extremely pleased with the sharpness at 1.8. The focus seems to be spot-on. I don't have a lot of experience evaluating lenses, and when I read about the problems people describe with new equipment on photography sites like dpreview.com, I get worried that I should test X, Y, and Z before being satisfied with the lens. But I consider "field use" the real test -- does it take the photos I want to take and perform as expected? Again, thanks to the arrival of The Great Blizzard, it will be a few days before I know the answers.

Meanwhile, on with testing ;)

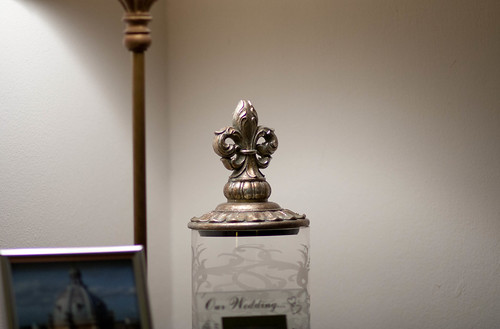
Here's one of the first shots I took after getting the lens on my 350D. It was taken at ISO 400, f/1.8, 1/250 sec:


And here's a small crop:


Now, the first thing I notice in this crop (other than the noise in the image thanks to the ISO) is a bit of what I believe is called chromatic aberration (CA) -- the purple coloring on the top of the piece, and anywhere the light is shining directly on it. The conditions for this shot were a little funky, as you can see from the full image above -- the container is sitting directly under a lamp, which is basically providing the only light for the scene. I don't know if that is contributing to the amount of CA I'm seeing here, or if this is a "flaw" of the lens at f/1.8 (and maybe the higher ISO has something to do with it?).

Anyway, the good news seems to be that it's pretty sharp (at least to my eyes). I believe I focused on the horizontal cross-piece, where the two "wings" curve around to. Considering the cropping I've done here, and the limited capabilities of my 350D's 8 megapixels, the image seems to be evidence of a sharp lens -- even at f/1.8.

I'm pretty pleased with my amateur tests, but I'm more excited to get outside and use it -- as soon as this snow stops!

Sunday, January 31, 2010

Second big snow

We had our second big snow of the season yesterday. Snowed all day, from about 9 a.m. until 5 or 6 p.m. Only accumulated maybe four or five inches, though. I went out this morning to take a few shots -- the sun is really shining bright.

I have re-decided (ha!) to get the 85 f/1.8. So I did a little DOF experiment with the tree branch below. I wonder which f-stop the 1.8 of the 85mm will be comparable to on the 50mm. I'm sure there's an equation that would let me figure it out, but adding 35 mms will probably mean that the 85's 1.8 will look something like the 50's 1.6, or maybe 1.4?

So the four shots below were taken in sequence, the first at f/1.6, the second at f/2, the third at f/2.5, and the last one at f/3.2:


Obviously I like the bokeh in the first photo the best -- I think it's pretty gorgeous, actually. However, I think the tree limb looks best in the third and fourth photos. If I were to try this again, I'd stand so that the limb was a little more parallel to me and take it at f/1.6 (or even 1.4) again -- that should keep more of the limb in focus, but still produce the lovely bokeh in the first shot.

The 85mm 1.8 is $379.95 (with free shipping) at B&H, which is probably where I'll buy it from. I ordered the 50mm from them, and it arrived really quickly. Seems that only L lenses come with hoods, which is kind of annoying. I know I should probably start investing in accessories like that.

I am also starting to slowly learn about filters and polarizers; we'll be at the beach this June, and I want to (1) keep my glass protected from the sand/salt, and (2) learn to take better coastal photos!

Saturday, January 23, 2010

Color

I wanted to talk about color for a minute, and also do a small test to see how colors are rendered on this blog versus the Lightroom software and my Smugmug page. So here's a picture of the flag, from last weekend, that has absolutely no post-processing (it doesn't need any! & at ISO 100 on a bright, sunny day with clear skies, it shouldn't!). Taken with the 75-300 IS:


It seems that colors are the most vibrant in Lightroom, not bad on the Smugmug site, but dulled a bit when posted here.

Here's one more from the waterfront last weekend, also with the 75-300 IS:


This photo was altered a little bit. I think the water looks good, but the four chairs are a little washed out, as is the railing I guess, just because it's white. The red deck doesn't look too bad.

Took some more indoor low-light photos last night at our friends' for dinner. Excited to see how those turned out. I'm trying to perfect photo-taking in that environment, since it's where I am so often. I meant to play around with fill flash a little more, but by the time I got around to it, Conan was coming on, and we all wanted to watch: what a great show.

Tuesday, January 19, 2010

Tried the 75-300 IS

Over the long weekend I went out picture-taking with my friend Katie, and we switched lenses for a while to see what the grass was like on the other side. She tried my 50 prime, and I tried her 75-300mm f/4-5.6 IS.

It was my first time shooting with a lens with IS. I rather enjoyed the reach -- it was so strange and wonderful to be able to get up close and personal with people really far away. We called it the "paparazzi lens." We just went down to Old Town on a sunny day, and here's what I found.

All of the photos are at ISO 100. This was zoomed all the way to 300mm, at f/7.1. I like the bokeh in this shot (thanks to 300mm!):


So we walked down to the waterfront, which was really busy since it was such a nice day. This little family was so cute. I love the mom looking at her guidebook magazine. Also zoomed to 300mm, f/7.1:


Okay, last one. I like the idea of this photo. I do think it's bordering on the edge of creepy, though. And no, she's not in her house -- she's in a restaurant! The big seafood place down at the waterfront. So, it's kind of stalker-ish, but I like the idea that she's framed, literally, in a window frame.


Overall, I enjoyed using the lens. There were definitely lots of moments where I wanted a wider angle, but I did like the reach. It was amazing how close I could get. But that long reach really makes composition difficult. I'd see a nice scene on the other side of the street, and by the time I got the camera to my face, a car had pulled up and blocked my view. Or a bus. I found cars to be really annoying on this particular "shoot." I guess that's a potential problem with all street photography, but if I'd been using my 50mm, for example, I would have probably been shooting on my side of the street much more often. And actually, there were several instances when I was using my 50 but I still wanted a wider angle.

I'm still waiting for the Feb. 9 Canon announcements to decide what lens I'm getting next.

Thursday, January 14, 2010

More street scenes

I tried my hand at "street" photography for a second time yesterday on my lunch break. Although, these photos should probably be categorized as "architecture" since they have few to no people actually in them :) I'm still scared to get in strangers' faces with my camera. The first photo below is one of the only ones with people in it. Settings are ISO 100, f/5:


I liked the symmetry of the two figures on the L and the R. I would have taken the frame down to the sidewalk if I could have, but I was shooting with my 50mm, and when I backed up enough to get the sides and the top of the building in the frame, there were two parking meters right in the bottom center of the picture -- where the door is. So I cropped those out because they were ugly.

I also had no idea how the white of this building would look. I think I've done okay, but I don't really have much to go off of other than my own eye. As I said, I took these on my lunch break, so it was about noon, and the sun was high, clear sky. That light isn't excellent for most photography.

Here's another store front. There are some really interesting-looking (& colorful) buildings in Old Town.
Settings are ISO 100, f/5:


I think I may have gotten a little out of control when adjusting the red tones on this one. It's so hard to tell what a photo actually looks like when you're moving it from program to program, where colors are rendered differently. I had no idea what this would look like on the web.

Ah, well -- excuses, excuses, right? I processed all of these in Lightroom (the beta). I'm trying to remember to use Lightroom instead of DPP from now on because I want to decide if I'm going to buy the full version when the beta is yanked. I do like LR... I like the amount of control it gives you, even if that sometimes makes it difficult to know when to stop adjusting! And it has the "straighten" tool, which DPP doesn't offer for some reason. I use it a lot :)

Also, a Wish List update: I may have changed my mind about what lens I want next. I really want to replace that kit lens, no matter when I get a new camera body, so I might go for the EF 24-70 f2.8L next. It's currently $1,277 on Amazon.com. I'm hoping to get it before March if I do end up going to NYC.

Monday, January 11, 2010

First try at street photography

I took the metro in to see my cousin on Sunday. I took my camera and went with the intention of forcing myself to try some real street photography -- candids of people in the street, store fronts, etc. But it was so freezing outside that I could barely walk from one building to the next without my fingers falling off (had on the fingerless gloves to leave them free to manipulate camera settings).

So anyway, I compromised by taking some photos in the metro. Here's one of the only shots I took of actual people -- there's something intimidating about photographing people that you don't know at such a close distance. It'll take some getting used to. It's at ISO 800, f2:


It's a reflection in the window. I then saw an even better composition, from directly behind them, and moved back a row of seats to get the entire scene in the frame, then someone promptly sat down right behind them -- in the way. Guess that's another peril of street photography. Bummer.

I enjoy looking at street photography, so I'm going to try my hand at it again when it's not so cold outside. I'll probably take my camera with me to work occasionally and try some shooting down in Old Town on my lunch break or something. I anticipate Old Town being quite a lucrative location. We'll see. First I need to see some temperatures above freezing!